
Not Freaking Out At All
- Oct 31, 2015
- 11 min read
So the start to this week wasn't great I'll admit. On Monday we were asked to show our room in engine, however the person we'd given the task too hadn't done that, and since this is primarily an engine project our tutor was right to be concerned about it. Therefore as the person whose the furthest ahead in the group at the moment, and as someone who likes engine anyway I opted to be in charge of getting the room sorted out. Why why why?
The first thing I did was lay out some criteria for my team. I'll admit it's a little frustrating having to lay out what should be basic checks for people; check you have no n-gons, make sure smoothing groups are applied, make a light map for your model, re-set the x-form, centre the pivot, align your object to world before exporting it as an FBX and uploading it to the drive, and please lets not forget, check the scale in the whitebox before you give it to me. I'm ahead but I still have my own work to do (and I'm only ahead in relation to other team members).
I also asked everyone to upload their textures to the drive, and to make sure they stuck to our specified naming convention e.g. Leather_A for albedo etc. I also asked people to do their texturing in a single unreal scene which they could save and give to me, since I was advised by a tutor that I could (try) and open up two engine scenes at once, and simply copy and paste materials from one scene into another, which would save a lot of time re-creating materials in the master file (which I hold).
Of course I still had problems with people giving me out of scale assets, and someone even uploaded a rug that was an n-gon. A rug that was one, giant, n-gon. So I decided to take that persons rug and do it myself, since I want a good outcome for this room. That did mean it was a little rushed, but if I have time I can go back over it, or they can take it from me and work on what I've given them...
To say I'm frustrated that I still haven't recieved everyone's assets is an understatement. Or if I have recieved them I haven't had the person with me to fix the problems their model had. For example I need to scale the walls and put the ceiling on before I can start lighting the room, and I need those people there with me when I do that. But there's only so much I can do unfortunetely. Hopefully by Monday I will have everyones stuff, and it's getting to the point where I may just take some people's models and do them myself since I've finished my assets. (I'd like to refine them further, but in my opinion they're at a pretty decent standard for the time being, and I'd like to have a complete room by the end of this).
I definitely think we should have planned more thoroughly from the beginning, been firmer with people from the get go and pushed to have people work in the same space. Our actual method for getting the assets into UE4 wasn't bad, and would have worked quite nicely if people had stuck to and understood the method. I set up a very clear folder on the drive and told everyone multiple times to put their engine ready assets into it. I don't mind putting the assets into engine myself. Importing doesn't take much time, and it makes sense for one person to have a master file of the level to work on. However that only works well if people give you correct assets. The only things that really changed drastically in scale from the original whitebox were my assets and the stairs. Yes other assets have had to be tweaked and will continue to be tweaked, and the walls are taking a while to get right in terms of wall positioning, but being given a tiny fridge shouldn't happen.
Well here is the current room at the moment (missing quite a few assets unfortunetely):

So anyway onto what I've done this week
The Project
So I kicked the week off pretty well to be honest. I managed to texture all my assets by wednesday like I'd wanted too. I also managed to get out and take my own texture photos which was great, and is part of the reason why I managed to finish texturing quite quickly. As it meant I didn't have to edit them too heavily as they were exactly what I needed, and saved me time trying to find the right kind of texture.
The Armchair
I've iterated this model quite a lot now. I recieved crit on my unwrap on Monday, and I was initially going to leave my unwrap as it was (as I didn't think I had time to re-do it, I was planning on applying what I learnt from the feedback onto a future unwrap). However when I started texturing I realised it was going to be much quicker to re-unwrap and then re-bake than tweak textures for ages. Since I’ve already sculpted it and had a good idea of a better unwrap from the critique I knew I could do it quickly, so I did.
So here's the new and Improved unwrap:

I also recieved some crit on the armchair model itself and used the FFD4x4x4 Modifier to put the chair on more of a lean so it looked more accurate to the reference. This also made the still re-creation look much more accurate without compromising scale.
However once I'd finished texturing I found I still had an annoying seam on my model due to how I'd modelled the arm as two seperate pieces. I decided again that I might as well just re-model that part, re-unwrap, re-sculpt and re-bake. So thats what I did.
Here is the final unwrap:
Here is the new model (I stripped it of a lot of unneccessary topology this time around):


And here it is with normals applied in marmoset(again):

Any textures used that are not my own have been taken from the following referenced site (and have been heavily modified and used on some of my models as permitted by the site):
Textures.com(2015)[Online] Available from: http://www.textures.com/ [Accessed: 19th Oct 2015-13th Nov 2015]
It's all much cleaner now, which I'm really pleased about. It's the first time I've actually had the time to properly iterate on a model and make it better quality than I initially finished with. It also taught me that whilst modelling something as seperate objects can be quicker and easier, there are times when it has it's draw backs, and it's actually better to model certain parts together.
I found the armchair quite tricky to texture. I think because I spent a lot of time thinking about texturing the couch before I did it, it came out a lot better because I understood the material much more. The armchair is like a fine corduroy material, which is called corded velveteen, so it has that lined but velvety look to it. To create this I actually used the texture of a corduroy jacket as it came out quite close to the look I wanted. I used it to create surface detail for the normals, much like I did with the couch.
Here are some reference images I used for the type of material the armchair is:

For the corduroy base I studied some actual corduroy and re-created that as best I could (I made a small section then copied it and clone stamped etc.
I then used lots of colour layers and render clouds, and hand-painted colour variation to get the look I wanted. I also used metal to get that texture variation that velvet has (again in a similar way to how I did the couch).
Here are the metal textures I used to do this (from textures.com):

Top Left: CGTextures, (2015), MetalBase0148 [ONLINE]. Available at:http://www.textures.com/download/metalbase0148/112551 [Accessed 31st October 15]
Top right: CGTextures, (2015), MetalBase0139 [ONLINE]. Available at:http://www.textures.com/download/metalbase0139/85406 [Accessed 31st October 15].
Bottom Left: CGTextures, (2015), MetalBase0125 [ONLINE]. Available at:http://www.textures.com/download/metalbase0125/71464 [Accessed 31 October 15].
Bottom Right: CGTextures, (2015), MetalBase0104 [ONLINE]. Available at:http://www.textures.com/download/metalbase0104/35605 [Accessed 31 October 15].
I made the roughness in a similar way to the couch. (I didn't really use Bitmap to make my textures for these assets as I found I preferred the look I got from creating the maps myself from scratch (since I'd made my own normals I think).
Here are the final armchair textures:

They look odd in engine at the moment, but hopefully I'll be able to fix that in engine. Since I didn't get time to fix my textures properly to match the new model and it's slight variations in the unwrap.
However here is the model in engine (before I re-modelled it):

(I'll put a pic of the final model up next week once I've fixed the textures).
I made the metal foot for the armchair as a place-holder. I'm thinking of making the feet out of a dark beech since you can't tell what material they are made from in the references, and from the images I've looked at of corduroy armchairs they tend to have wooden legs not metal ones.
Here's the metal texture I used a base(the other details on it come from the metal textures I've already referenced on here):

CGTextures, (2015), MetalBase0121 [ONLINE]. Available at:http://www.textures.com/download/metalbase0121/57525 [Accessed 31 October 15].
The Pillow and the Cushion
These were very simple to texture if I'm honest. I used my own textures for them.
This is the texture I used for the pillow:

And this for the cushion:

I used high pass to strip them of light information and then a gradient map to give them colour. I then dirtied them up a bit by selecting parts of these textures(From Textures.com):

All in all pretty simple, but I think it gave me some really nice results:
I could definitely refine the pillow more though, make the dirt look a bit more natural and play around with the colour a bit. Again with both of these, I gave the normal maps some surface detail by overlaying the base textures onto them.
Here are the pillows final textures:

And here are the cushions:

The Blanket
This I'm ok with for the time being. I realised whilst texturing it that I should have considered the problem of having different pixel sizes for the back part of the blanket and the front. It caused a bit of seam (since the blanket pattern looks like two slightly different sizes there. There's also a slight seam there because lining up the pattern between the two different UVs was very tricky. I'll see if there's anyway to change my unwrap to make this neater next week. Since I couldn't tell what blanket it was I went with a waffle blanket as this seemed relatively close to the reference. Luckily my flatmate owns a waffle blanket so I used that as my base texture. It involved lots of repeating sections, transforming sections, rotating them round, warping them, and I even created a pattern brush from one of the woolen squares to paint in the varition in direction along the two edges to make the seam less obvious. Other than that I used a very similar methodology to create the blanket as I did for the pillow and cushion. I also adjusted the position of the pillow and used stains to hide the seams as best I could, in case I don't have enough time to fully fix them.
Here is the base texture I used for the blanket:

I used the same textures as above to add dirt, stains and roughness variation to my blanket. As always there was also a lot of tweaking levels in photoshop to get the blanket to look right in engine.
Here are the final textures for the blanket:

However I think it turned out pretty well, here is the final blanket, cushion, pillow and couch in engine:


For some reason when I put the normal maps for my blanket and armchair into engine I had to flip both the green channel in engine and in photoshop for them to look right. Not sure why that was, but it's fixed now.
Finally I did one of my team members rug for them, as they gave it to me like this:

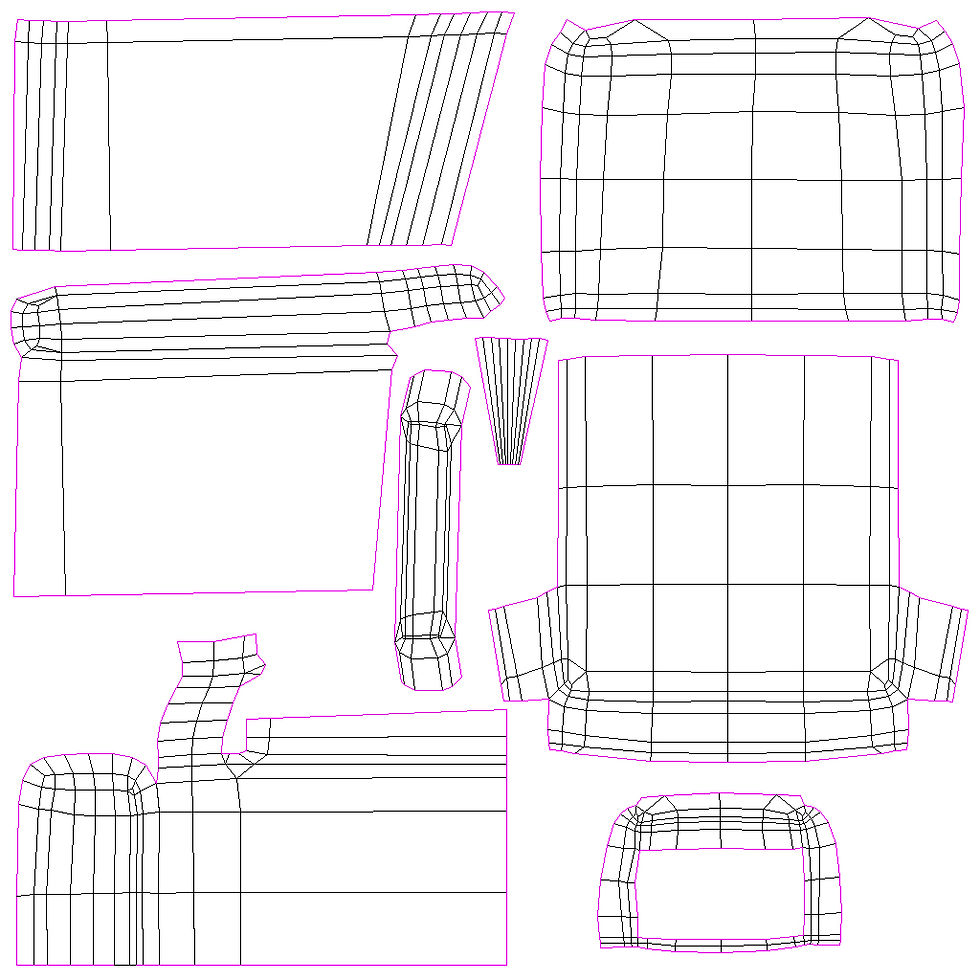
So I remodelled it:

Unwrapped it:

And re-scaled it.
And then used a tileable 256 texture for it. Luckily I already had a photograph of a blanket I own (I took it whilst taking texture photos for the other stuff) so I used that as a base for the rug
Here is the base texture for the rug:

Here is the height map:

Here is the first normal map I created from the height map in crazy bump:

The normals involved quite a bit of iteration to get them to look right, but eventually I ended up with a result I was ok with. When I first put it into engine I realised I need to make the normals more intense in order for them to show up on the rug. So here is the new normal map:

I hadn't done tileables in a long time so getting it to tile right was a bit difficult. Initially I had way too much colour variation going on for the rug so the tileing was very obvious. I punched up the levels in photoshop to give the rug more definiton (I know albedo's don't have light information, but the albedo looked way too flat even with normals applied when I just used high-pass on the base texture, so I gave it a bit of contrast. I also hand painted some subtle colour varitaion onto the albedo so again, it didn't look too flat. Then I used text-co-ordinates in engine to play around with how much the rug tiled, so that the size of the uh..grain? looked about right.
Here is the rug Albedo:

And the roughness:

And Here is the finished rug (for now):

It certainly needs more work, but thats not my job right now unfortunately.
On the positive side of things. I feel like this week I've really started to get my mojo back with the course. I feel like I'm working more efficiently, I'm less stressed because I'm working better hours and my time management in general is just improving. Of course I have things to work on, but overall I feel like I'm not only improving my technical skills, but also the soft skills I need to be a successful student/artist. The silver lining of having an un-organised group is it means you have to be super organised to ensure the groups success.
I found game production this week very helpful as it went over the basics of modelling, unwrapping and texturing. It's stuff I always want to be improving. My unwraps are ok but they could definitely be improved. I realised that recently I haven't been thinking about how my unwrap will affect my texturing that much, in regards to seams, so it's certainly something i want to start thinking about more whilst I work. I also found the advice about what to think about whilst modelling very useful, as I'm someone that likes to think in checklists to ensure my work is the highest standard, and it helps focus me...since i'm not the most focused person naturally.
In visual design this week we went over some post-process effects in engine, which will be useful to know for when we start polishing our project off next week.
Critical studies was all about project management this week, which is 100% something I need to work on. Well, it's something I think I'll always be working on to be honest. It's information that will certainly be useful for when I review this project at the end and analyse how it could have gone better. My personality came out as a conductor in the seminar which I found interesting, as I wouldn't normally call myself a leader. However I think I've needed to be one this project, so naturally as people we slip into roles when they're needed, and this project that happened to be a leader role.
So finally, the action plan.
The Action Plan
Project wise I need to:
Polish/Refine my textures
Work on lighting in Engine
Hopefully work on the stretch goals-Modelling extra assets, adding sound, giving the room some life.
See if I can make any models/unwraps neater (essentially get all the critique and apply what I have time to apply and take on board everything else for future projects)
Armchair texture is a priority though
Do some general file keeping
Keep a neater photoshop file structure in future
Clean up my Max scenes (prepare for hand in essentially)
Do a final analysis of the room and finalise the rooms still (once the assets are all in)
Well thats all folks, as always I want to try and take smarter progress screenshots as I work, but right now, most of my personal action points are in progress, and until I find new ones, I'll work on refining these current issues until they are no longer (hopefully) Issues.


Comments